
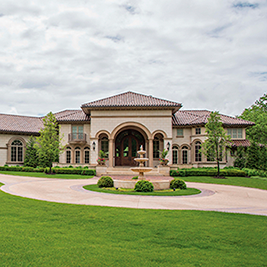
“AN UNFORGETTABLE EXPERIENCE”
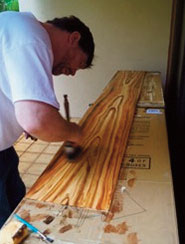
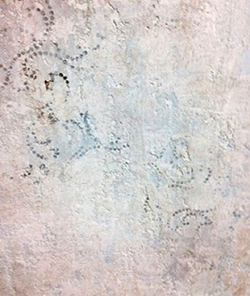
It's all in the details... they say. This is a comment commonly made by craftsmen discussing, with passion, their trade. A call came from a long-time acquaintance building contractor regarding a large custom home involving a substantial amount of custom wood finishing. The usual pricing and meetings ensued regarding the project. Then began the process of finishing a large rustic alder woodwork package. Back to the comment of, It's all in the details—Top and bottom edges of doors receiving the same number of coats as the face to prevent warping and cracking, casings and baseboards being back-sealed prior to installation and wood timbers custom-stained to accent the different living areas. Being an avid wood grainer and marbler, and having the opportunity to study all the natural grain patterns and knots, was truly inspiring. It helped to alleviate the tedious though important work of sanding and dusting to get those silky smooth finishes that the customer desires.
One day I commented to the contractor as he stopped in to observe what I was doing, "Have you ever seen my samples?" He replied, "No, but I'd like to see them and also show my wife, because we are planning to build a log home we've been dreaming about for years." Several days later I spread out my samples among the timbers, trim and casing and said, "Well, this is a small sample of what we can offer as a decorative finishing company." They were immediately attracted to a jelly cupboard door I had removed from my own personal piece of furniture. The customer remarked, "This is exactly the finish I remember seeing at the neighbors’ house when I was growing up... that would look good on our island! It would so tie in with our salvaged barn wood cabinets." The meeting ended, and the customers thanked me for showing them my samples with their final comment being, "We're planning this in about a year from now, and we would like you to finish our island. Your samples are beautiful, but we want all our finishes to be natural wood."
On my part the project was somewhat forgotten as other projects came in—some tedious, some interesting—the typical scenario in applying decorative finishes. There is a lot of work in the details; but, one day the phone rang with a request, "Can you clear coat the interior of the logs in our home? We sanded the rustic, factory-finished logs because they came considerably more rough than initially anticipated—too rustic to the touch. We've got grandchildren and are afraid they will get slivers. Can the sanded logs be glazed?" Samples… samples… every decorative painter knows about samples. They were made on leftover chunks of wood, timbers—some stained, some clear coated. The stain applied at the factory obliterated the circular saw cut marks, which was a detail the client wanted as a prominent feature. By sanding the too rough logs, this look was rediscovered. The client chose to seal the interior logs with two coats of Varnish Plus™ Dull, applied using airless spray equipment on walls reaching the soaring heights up to 32 feet. Such large expanses require equipment that can lay on a nice even coat efficiently and quickly. This work was to be completed before the clients flew in their chinking crew. Again they said, "We want you to finish our island when we are ready.”
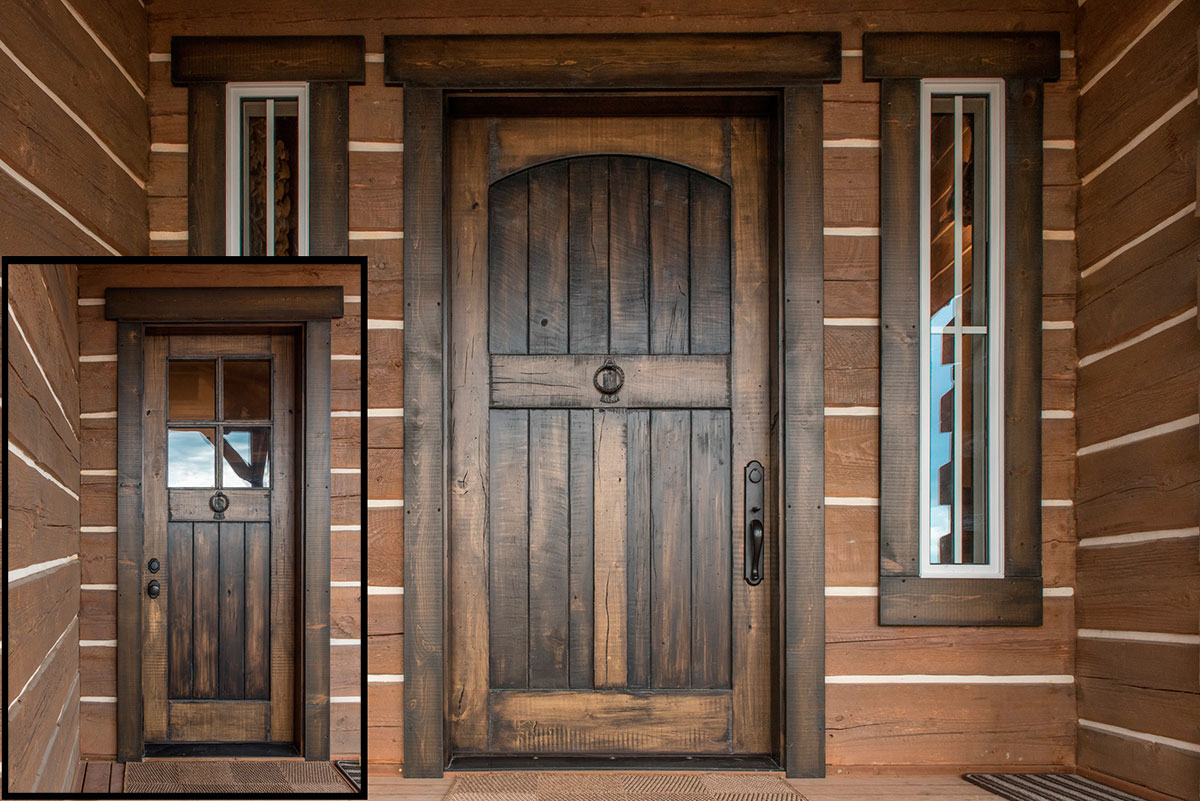
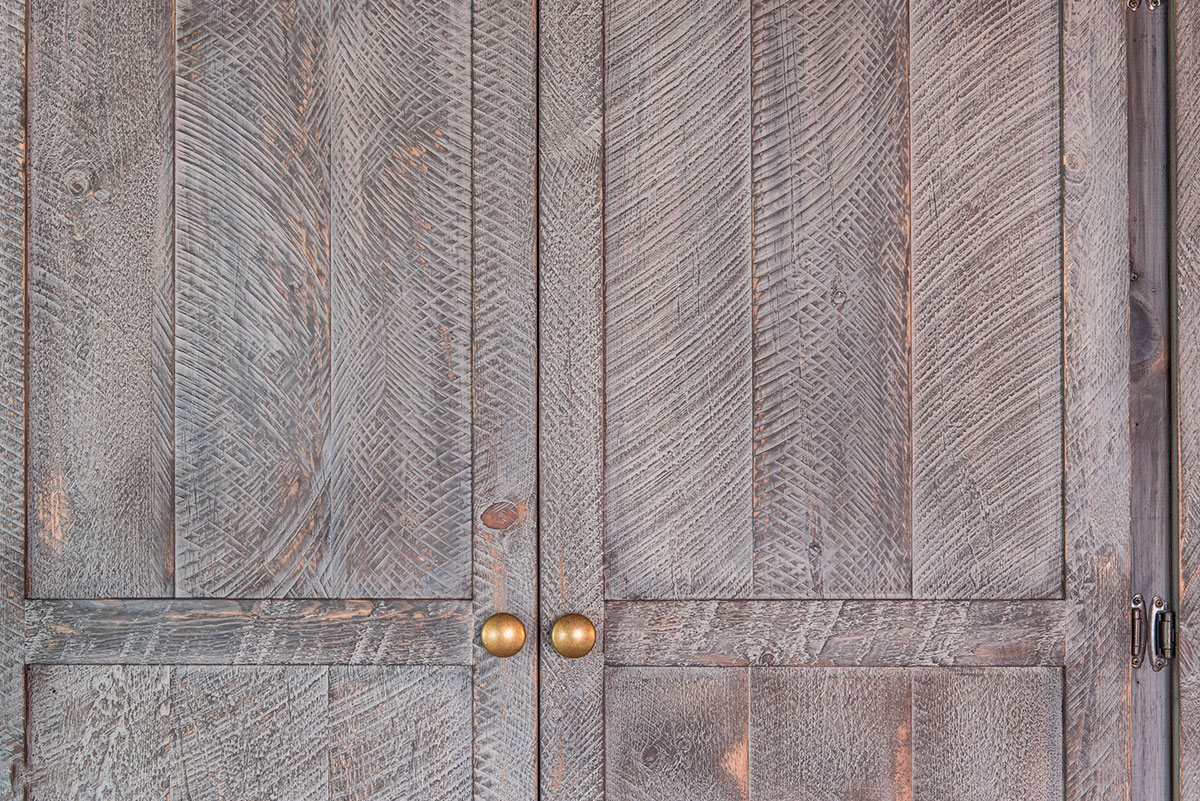
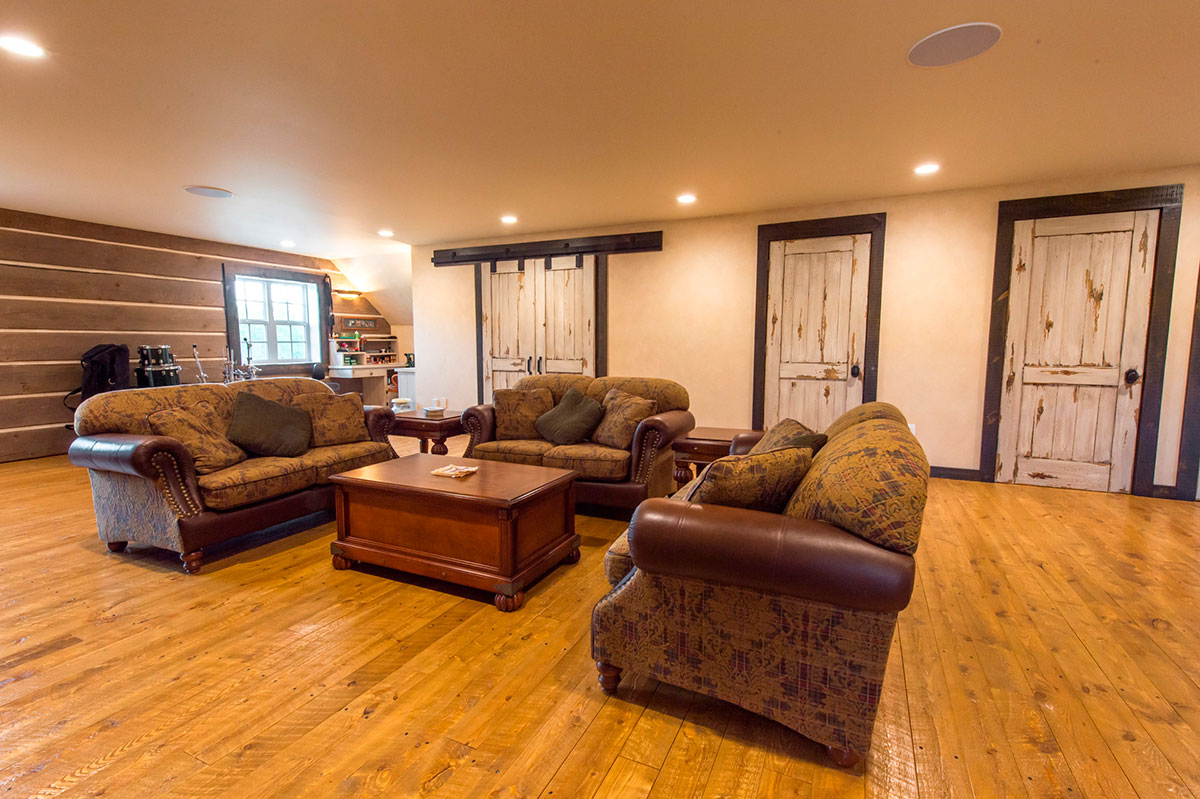
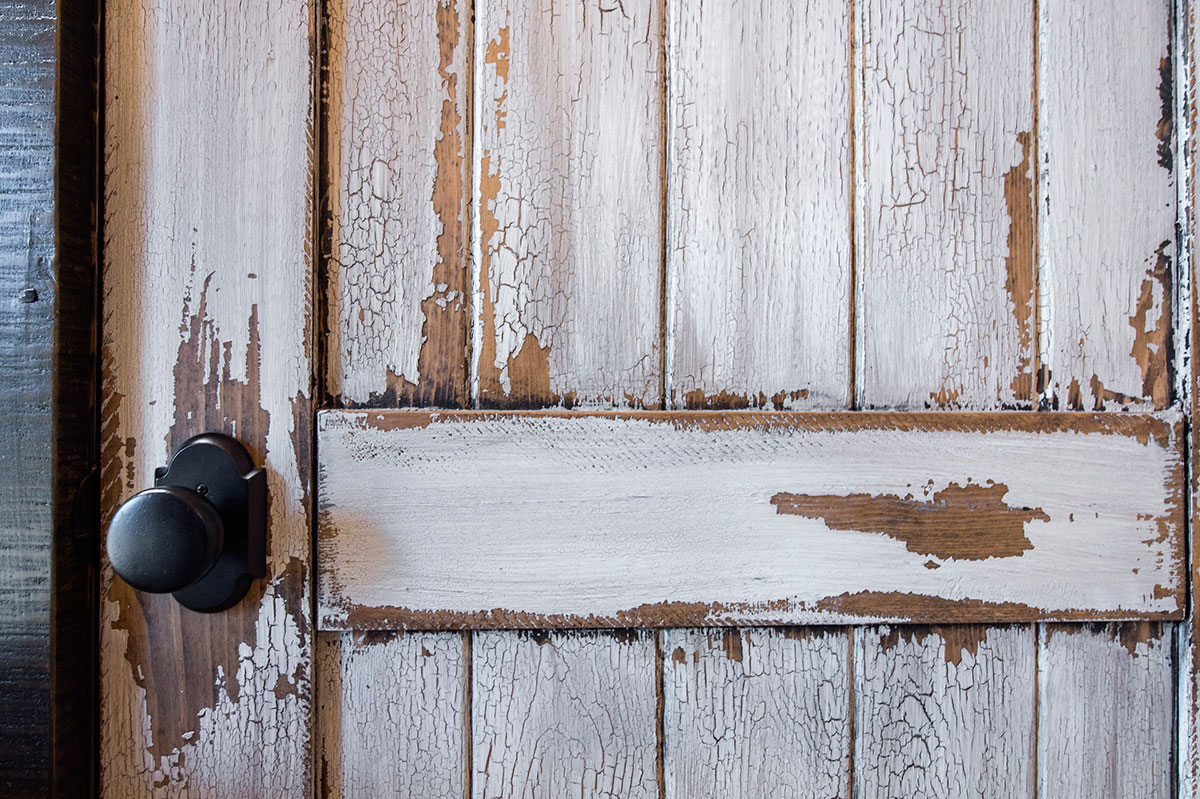
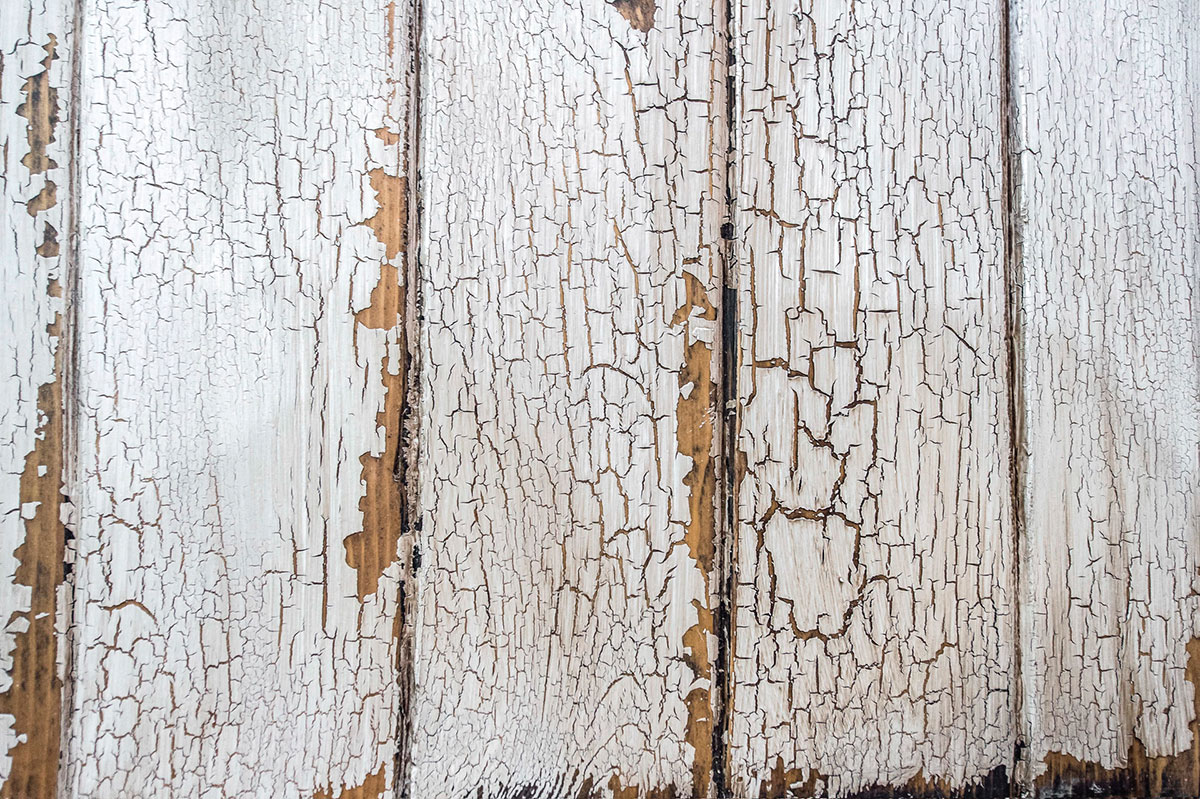
Then came the discussion "What can we do with our two custom-built wood front doors? They look too refined”. "Oh,” we replied, "we can beat them up, carve them up. It's just a matter of how much?" More samples…we used knives, paint scrapers, a sharp rock that was found on site, nail sets, a hatchet…and the distressing began. Not just a haphazard beating any old place, but careful consideration as to typical placement of nicks and gouges which come from years of wear-and-tear. Clusters of worm holes were punched in with nail sets, corners were rasped, mill marks were accentuated, and finally, natural checks in the wood were carved out by hand simulating the natural checking appearing on timbers right beside the door. Several times during the distressing process the clients were consulted about placement of cracks and distressing marks at the level of rustic that they envisioned. Weather in Manitoba is harsh—summer temperatures up to 100*F, humidity in
the upper 70's, with winter temperatures dropping to 40⁰F below—and all seasons including wind and sun. Exterior wood finishes developed and tested in Canada were chosen to protect and beautify the wood doors, while remaining compatible with Faux Effects® glazes and colors. Van Dyke Brown and Black FauxCreme Color™ were used to accentuate the details.
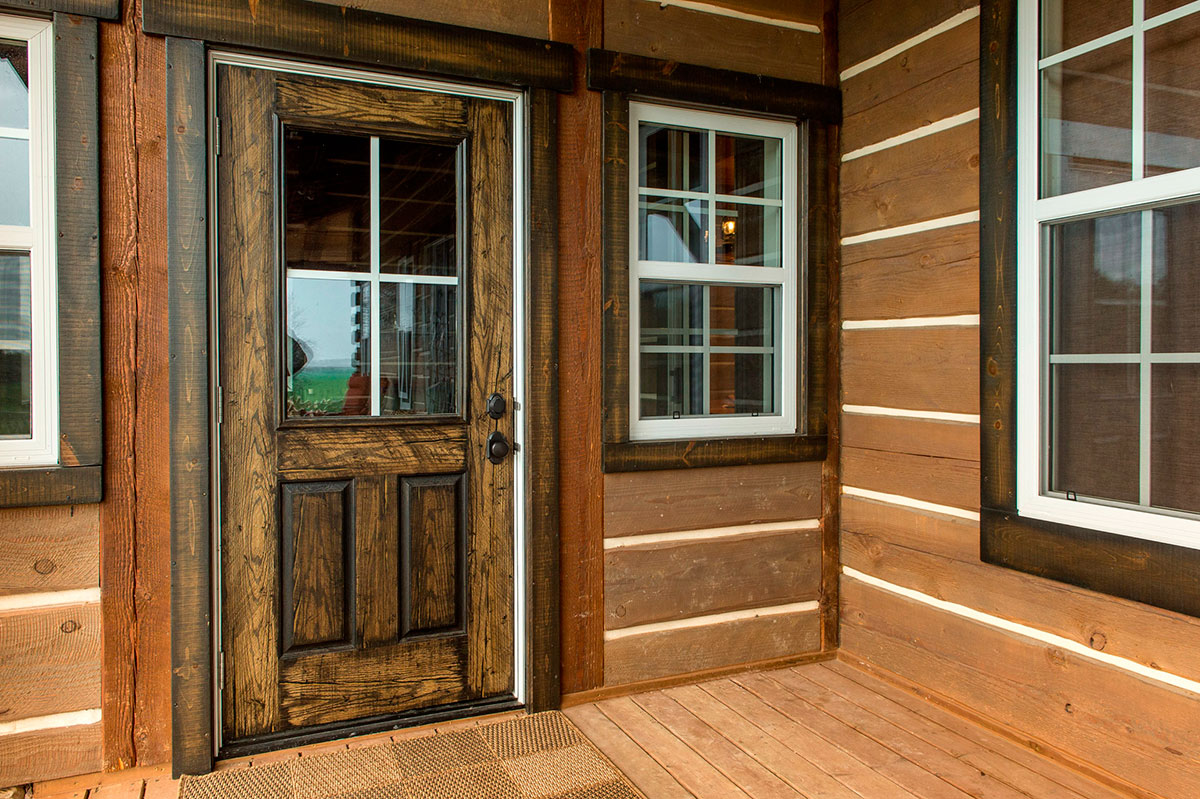
Numerous embossed fiberglass doors were treated with multiple layers of glaze to reveal the woodgrain pattern pressed into the fiberglass skin. Dry brushing and cow-tailing techniques were used to distress and create saw marks found in real wood. Then, dark cracks and checks were painted on to match the surrounding timbers. Lastly, protective topcoats were applied at an autobody shop, providing maximum longevity for the doors.
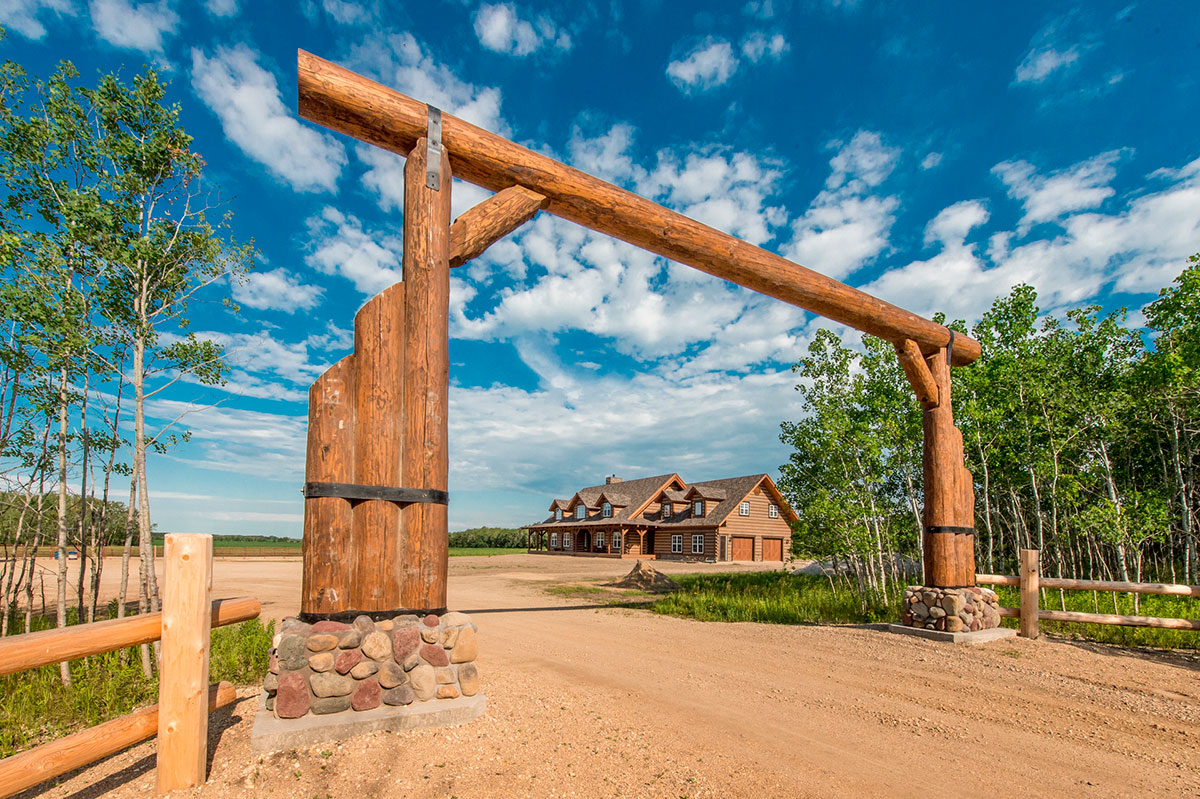
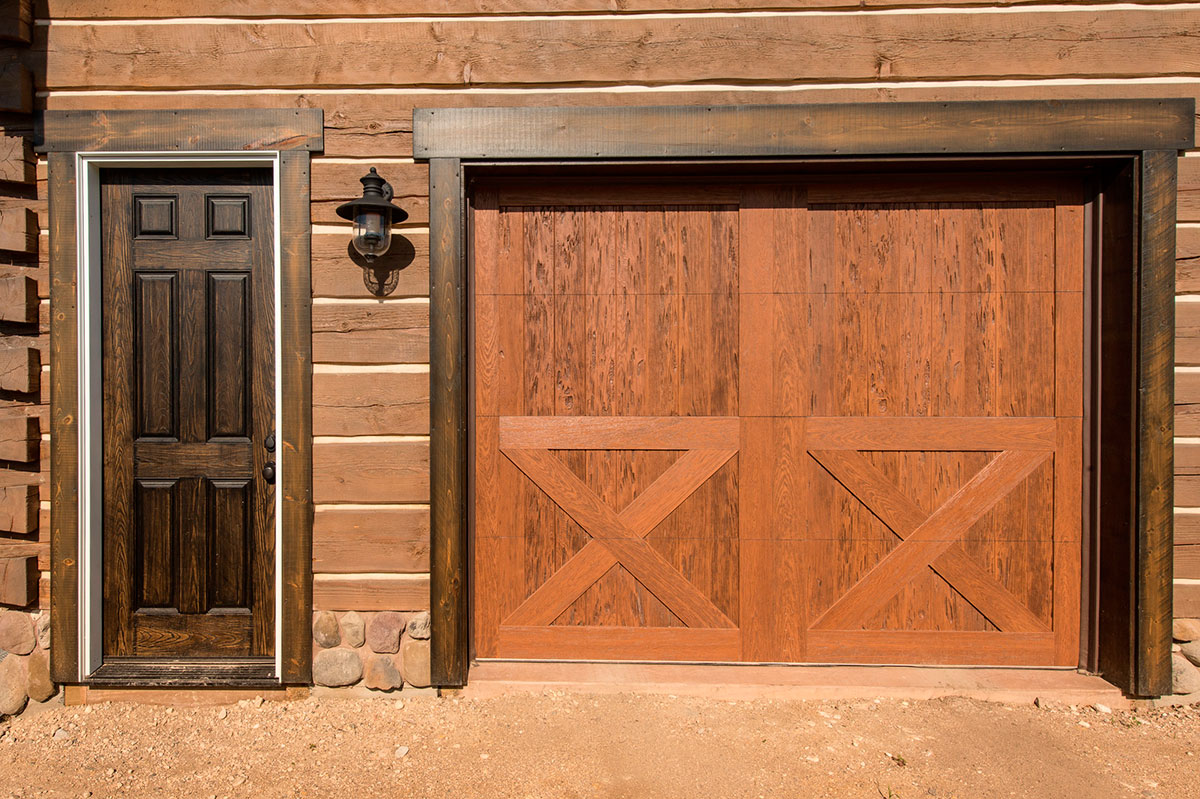
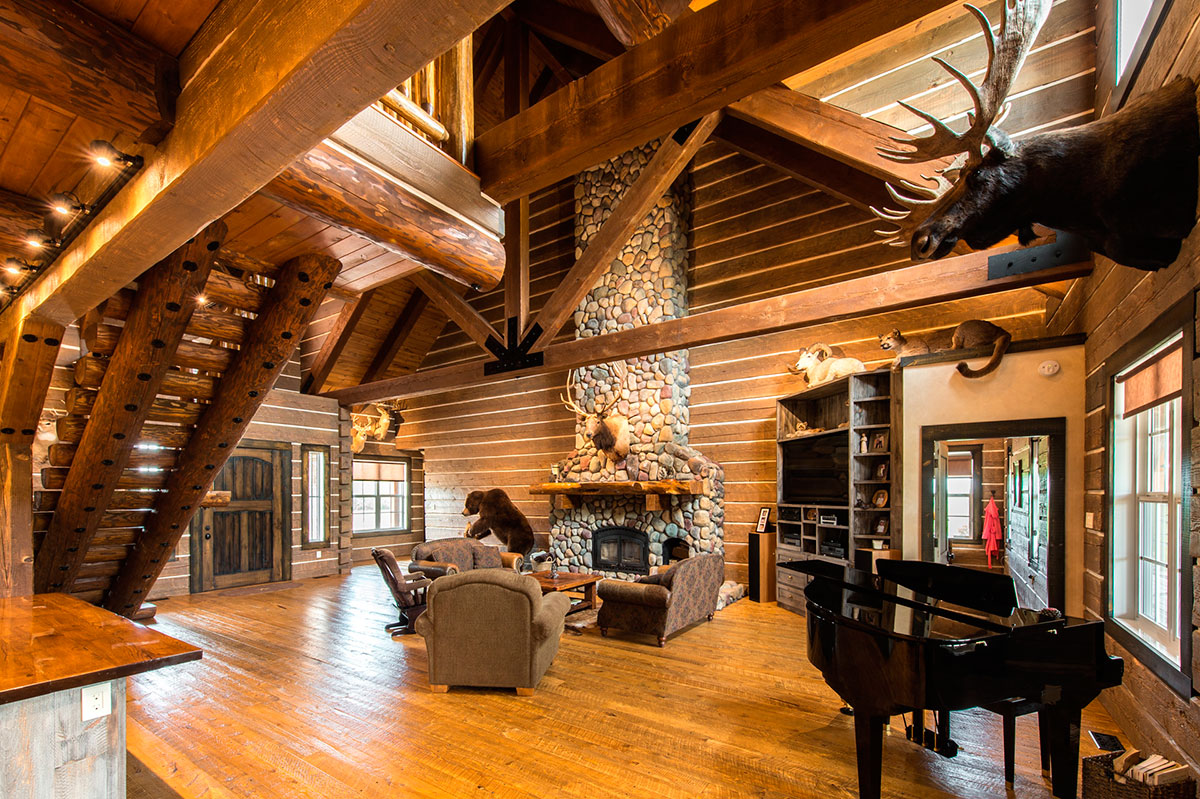
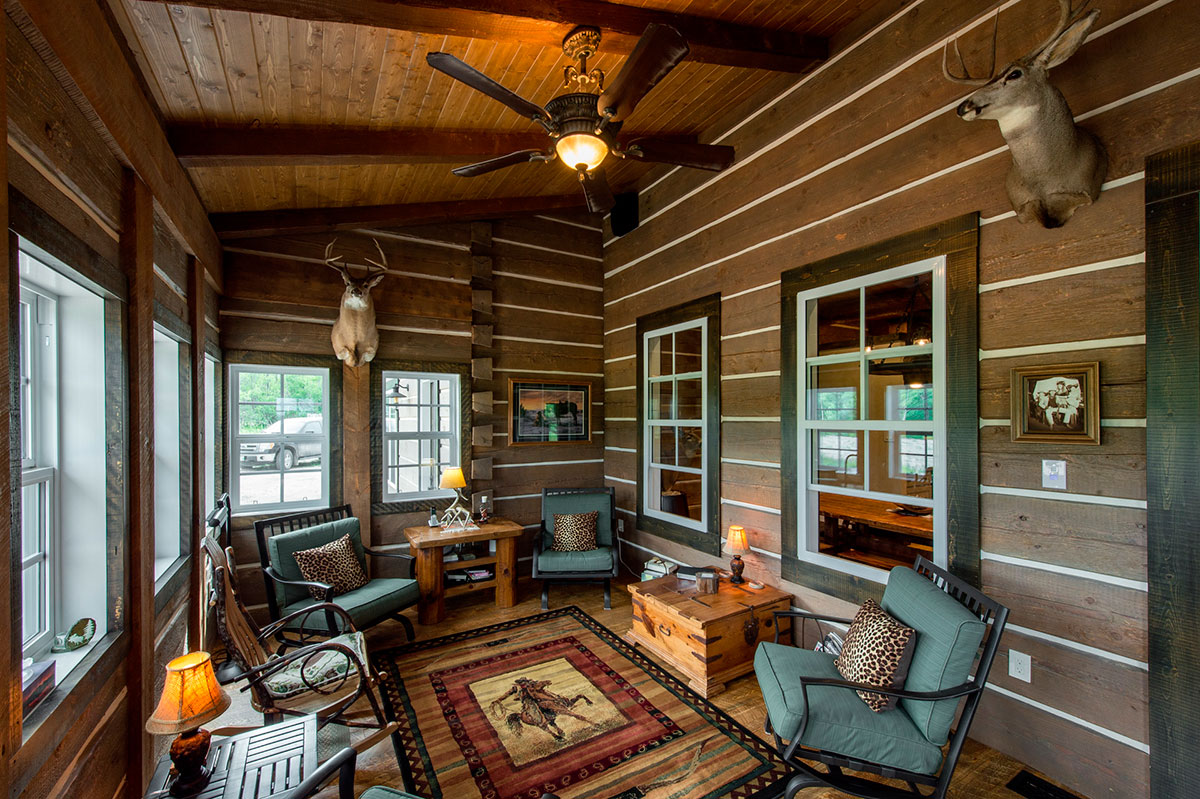
Typically trim around windows and doors would be fastened into place and finished later. In keeping with the rustic charm the decision was made to pre-fit all the trim boards on the exterior, then apply an antique finish to the individual boards and refasten them, thus ensuring all edges and backs were sealed. Consideration was given that the colors would coordinate with the rugged timbers, the lighter-toned windows and chinking, and yet provide enough contrast to break up the long expanses of log walls.
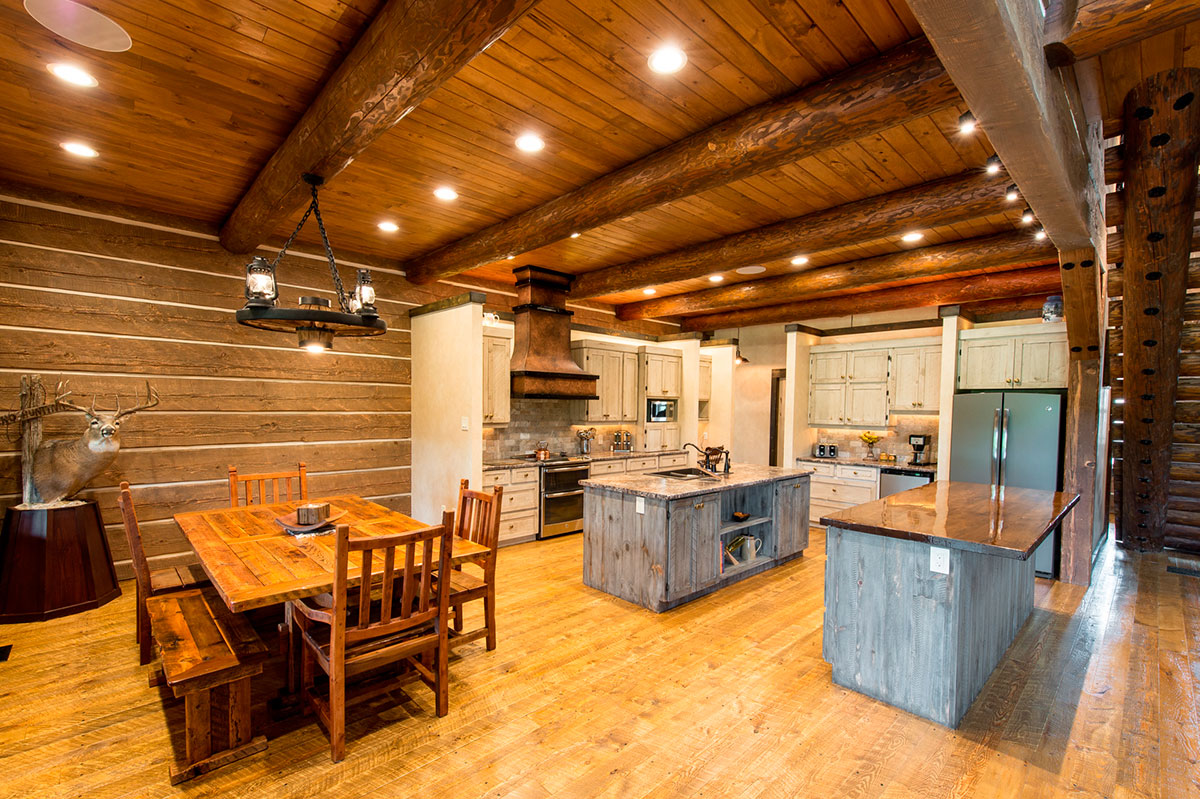

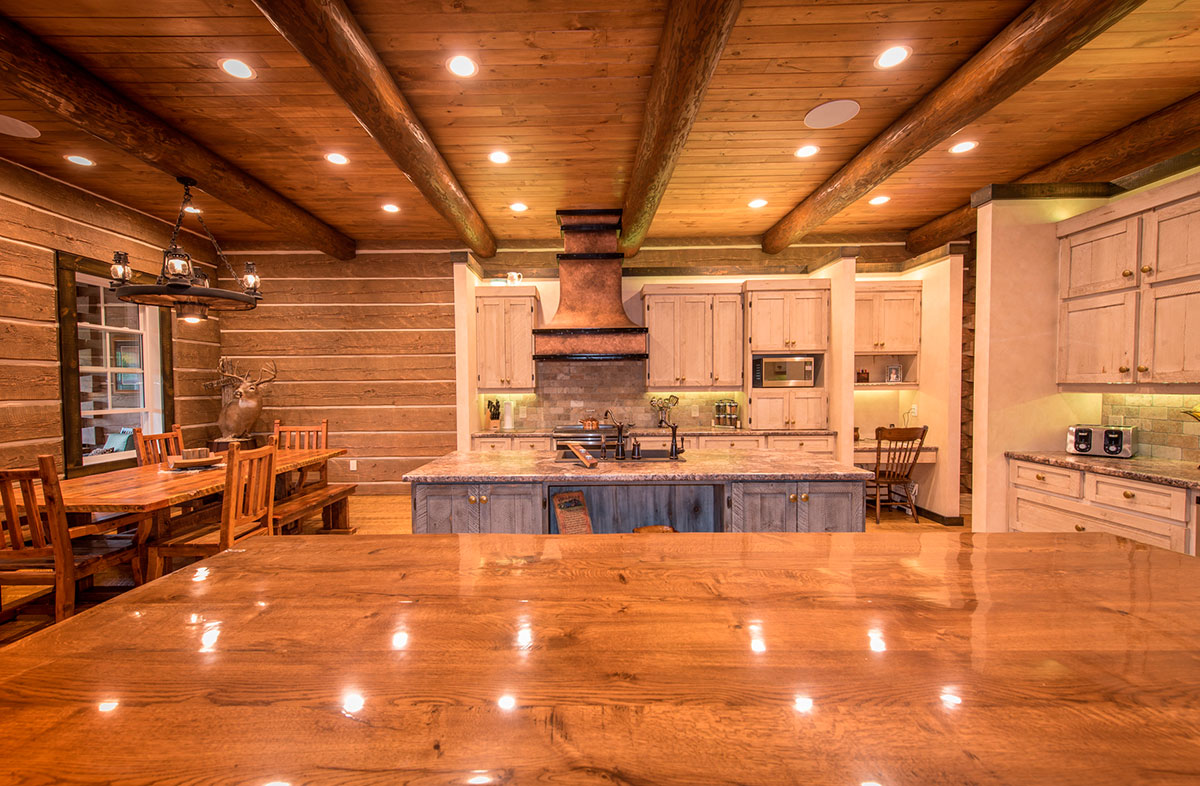
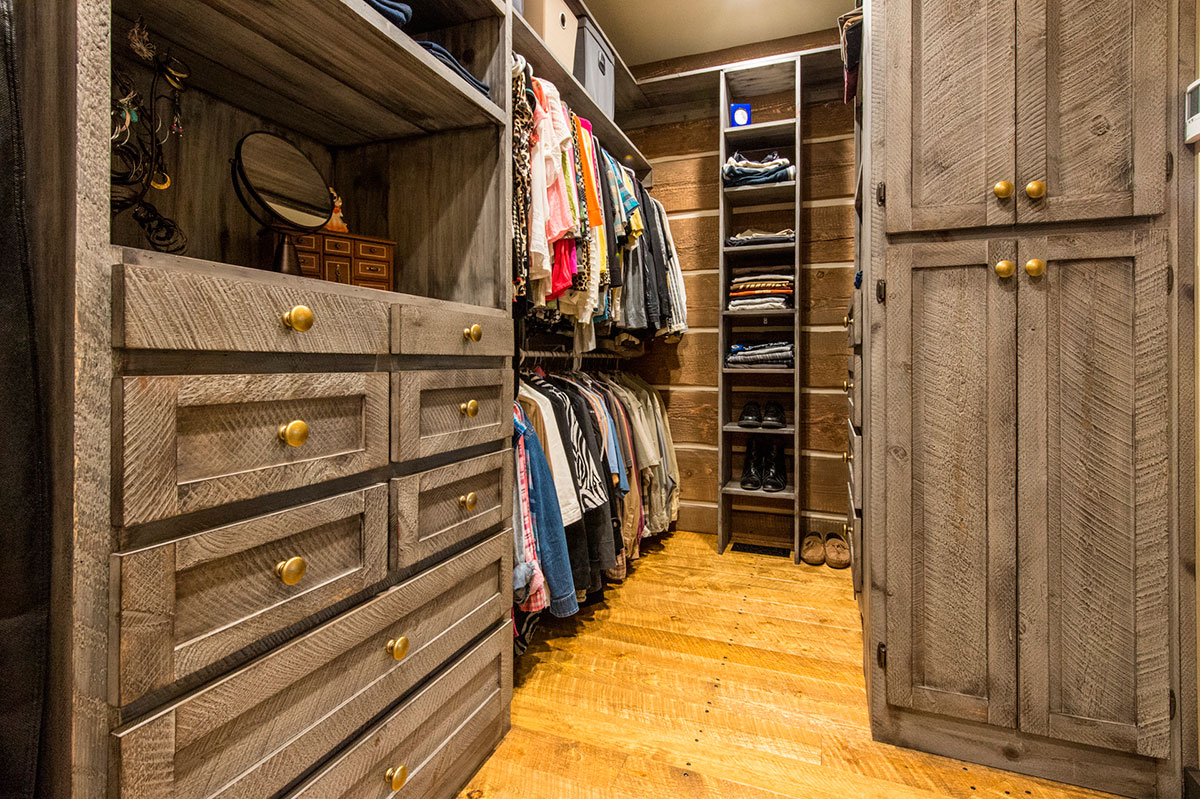
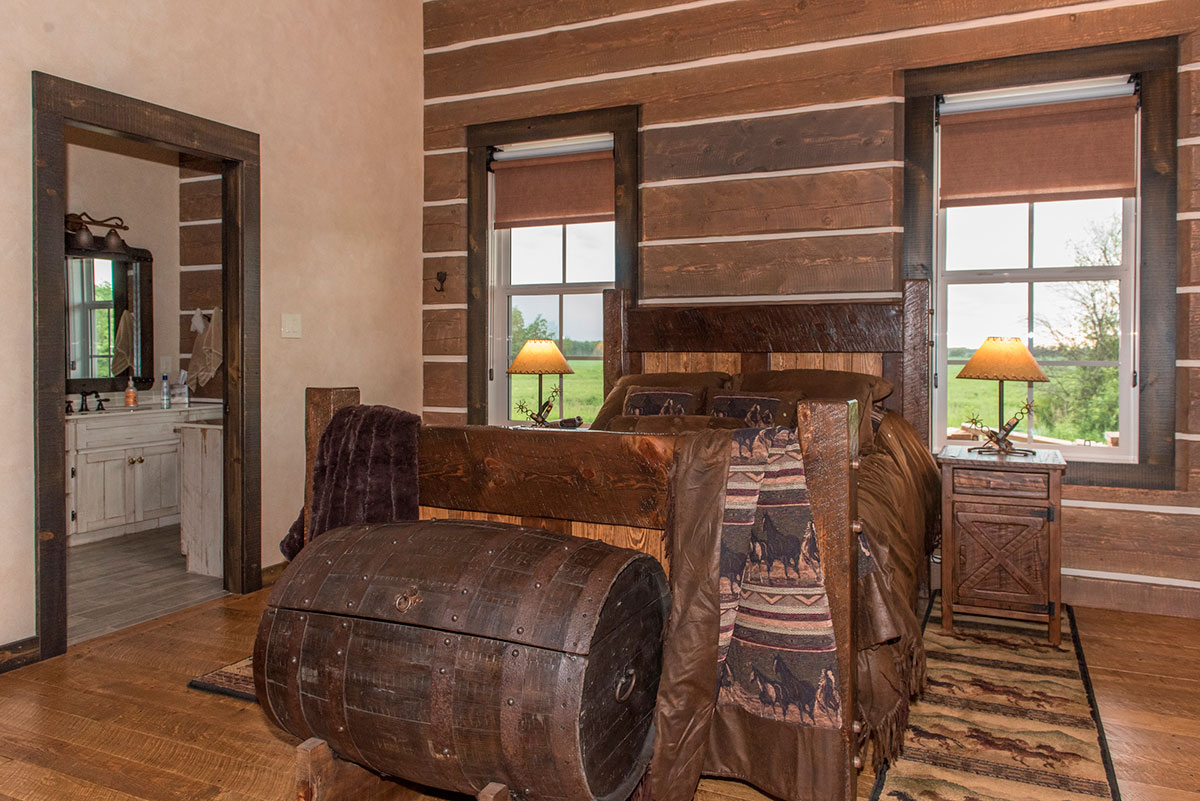
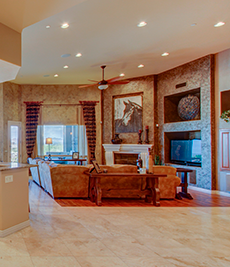
Original plans were to have their cabinet maker mill 95-year-old barn boards to create a custom kitchen. After having old barn wood milled and shaped into a sample door, a lot of new wood edges were exposed. The combination of not only touching up the color and texture on the narrow edges, the difficulty in cleaning the deep texture of weathered wood, and the fact that a lot of that silvery-grey patina is lost if you apply sealer to it, made the use of old barn wood impractical. Kitchen finishes are unique from wall finishes in that they not only get a lot of handling and cleaning, but also they tend to be a major focal point for the aesthetics of a home. These cabinet finishes, which included custom-built entertainment unit, vanities, kitchen and islands were no exception. The customer requested that the cabinets have a rustic look, including somewhat of a rustic feel, while maintaining easy clean-ability. Then came the challenge to re-create silvery-grey barn wood. Upon studying real weathered wood, it is evident that the colors range from bleached white to silvery-greys with green, blue, or brown undertones, to wood appearing to be charred nearly black. The wood reclaimed from the 95-year-old barn had a bluish undertone. The clients also requested that the areas of the cabinetry that would normally receive wear should show the natural wood tones through the weathered wood patina. Many hours of sanding with fine sand paper were spent to produce subtle transitions from one color/layer to another. Van Dyke Brown FauxCreme Color™ was dry brushed into the corners in imitation of stain left by the ingress of moisture.
Fly specs and cow-tailing were added to age-detail the veneered panels that had been delineated with script brush in a painterly fashion, giving the illusion of separate boards. Then the overall cabinets received a dry-brush that highlighted any imperfections in the wood, at the same time accentuating the fine detail of the woodgrain. Then two coats of Varnish Plus™ Dull were sprayed to give the wood protection and a silky smooth feel. On the chipped, random-crackled cupboards, an activator was applied to the areas where the finish was to be chipped, including knot holes. Crackle paint was brushed over the rough wood and after allowing it to set, different scrapers and tools were used to remove paint in a balanced manner. When this had dried, again the sandpaper was used to smooth the surface and feather the transitions from paint to wood. Knob placement was decided upon, and then paint was carefully removed exhibiting wear. Once dry, an umber glaze was brushed over surfaces then carefully pulled into the recesses created by the rough sawn texture. The dry glaze was rubbed through here and there, increasing depth and interest. Final protective coats of Varnish Plus™ Dull were applied by spray. Hand-applied finishes like these are tedious to execute, yet the final result is incomparable in appearance to factory-applied finishes.
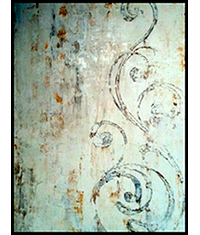
All drywall surfaces received two coats of a self-priming acrylic paint. Ceilings were then finished in a soft ivory-colored matte. Adjacent surfaces were protected, and then, the multi-layered suede parchment finish began. During the sample making process, a brushed finish was chosen, because much of the drywall abutted against finished logs, of which some were in tight corners. Layers of SandStone™, PlasterTex®, Venetian Gem® and Venetian Gem Bellissimo™ were brushed on, leaving a soft texture. This was then overglazed with an umber tone, and after drying, the finish was sanded to accent the movement created by the brush. Again, a protection coat of Varnish Plus™ Dull was applied to the walls. This final protection coat was needed, as the clients’ grandchildren frequent this place, and much time is spent in the outdoors and in and around the horse stable. "I want to be able to wash little grandkids' finger prints off these walls," was the client's request.
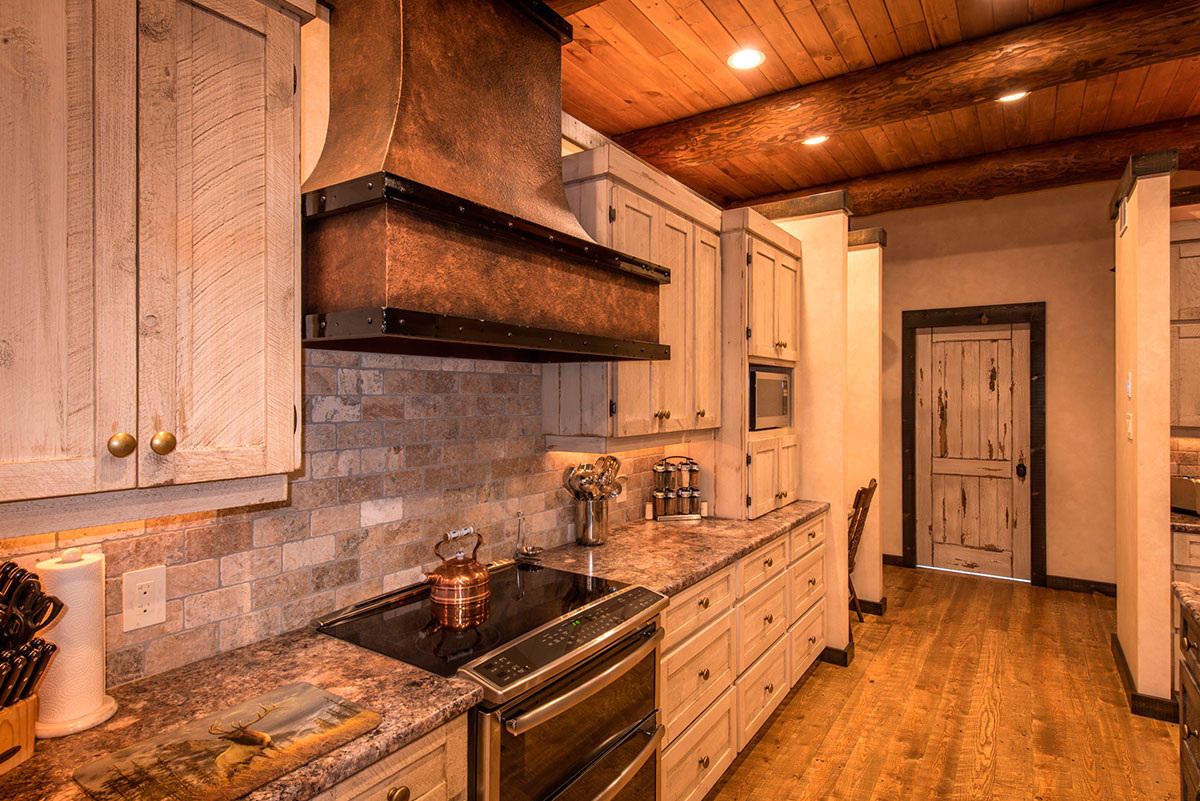
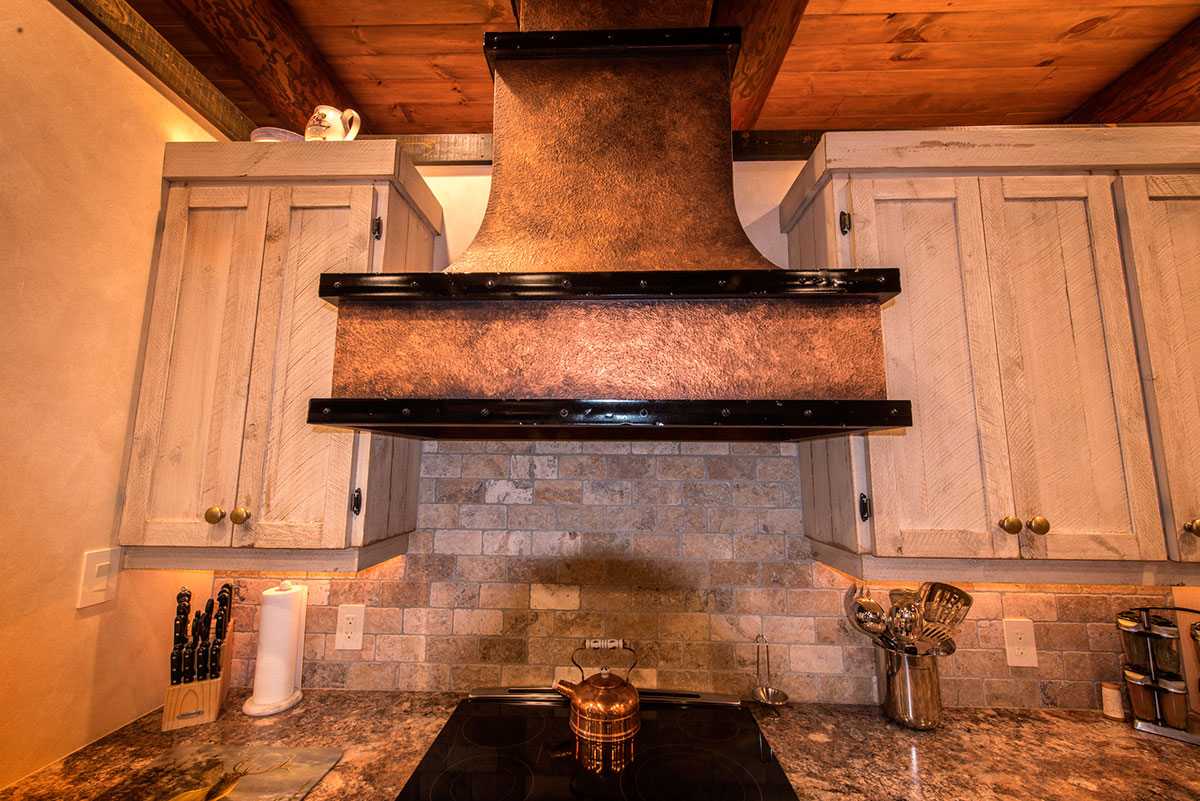
A creative cabinet maker with a shop full of tools built the base for what was to become a hammered copper range hood. It was then sanded, filled and primed to achieve a smooth layer. Two layers of Leather Red SetCoat® was followed by a texture layer of Ruby Venetian Gem®, stippled to emulate a hand hammered finish. PrimEtch was used as size for the copper leaf. The texture required that the entire range hood receive two layers of copper leaf. A glaze was applied to give a soft, time-worn patina, and AquaThane™ Satin to seal the surface for durability. Then, custom-built wrought iron bands were fastened and finished with a semigloss sheen metal paint to contrast with the softness of the copper finish.
In the meantime, an order of custom-sized solid pine doors were en route to the project. Doors were removed from the packaging and the question was asked, "Which finish do you want on these?" So, back to the sample making process. What came out of that process was a multi-layer, crackle, chipped, distressed finish that, after the client had toured his elderly mother through the house her comment was, "Doors like that we threw out years ago!" What a compliment to receive after so much effort to research and develop finishes reminiscent of an 1800's+ era Appalachian mountain log home. As a finisher, I tip my hat to my clients’ 20+ years of dreaming, for their patience when I couldn't translate their vision into reality the first time, and for their unbounded enthusiasm with the results. Thank you for allowing Stoney Brook Painting to enjoy this creative process with you...what an unforgettable experience!
DECORATIVE ART BY: PHIL WIEBE
PHOTOGRAPHY BY: DENNIS FAST PHOTOGRAPHY
WRITTEN BY: PHIL WIEBE
If you enjoyed this article, send
it to your friends on Facebook!